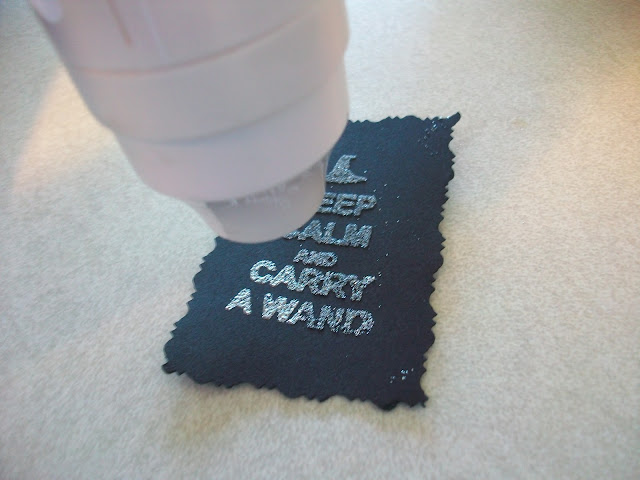
how does a little crafting sound on this lovely tuesday morning?! stamp embossing is one of my new favorite additions to cards and gift tags. once you have the supplies, they can be used again and again and add a little something special to your projects.
supplies needed:
embossing stamp pad
embossing powder in color of your choice
stamp
small brush
(all can be found at a craft store!)
1) place stamp firmly on embossing pad, pressing down evenly.
2) place stamp on surface to be stamped, again: firmly and evenly.
3) after lifting stamp away, immediately coat image generously in embossing powder. do not be afraid to overuse here, you want to make sure there is more than enough.
4) dump excess powder on a piece of paper with a crease in the middle (so as to easily funnel back into container. very little is used on each image!). to get rid of clingy excess, tap the back of the paper and then use the paint brush to brush away any strays before applying heat.
5) take heating tool and hold approximately 2 inches above the surface. move slowly above ink in a circular motion, never pausing too long in one spot so as not to scorch the paper.

6) continue to move heating tool until the powder melts and forms a uniformly raised, glossy surface, which should take about a minute.
7) allow image to cool for about 30 seconds.
finished products:
{used on halloween cards, 2010}
{gift tags, christmas 2010}
questions?! leave them in the comments or shoot me an e-mail!
xo. di.
*all images via my personal collection


Ohh I love how you stamp the silver onto the red wrapping paper! The leaf and the cursive writing is really beautiful :D
ReplyDeleteI love embossing! I used to have all the tools for it, but I haven't done it in sooo long! They definitely add a very special touch to any card/gift wrap :)
ReplyDeleteAnd I love that stamp, hehe - carry a wand! :)
This is wonderful, thank you for the tutorial! I may have to attempt this come Valentine's Day.
ReplyDeleteoh my goodness! Keep Calm and Carry a Wand! <3 it :)
ReplyDeleteTrue story, I took the after-school STAMPING class at Van Hoosen. I think this was before I had any friends, right after moving to MI...judge me.
ReplyDeletethanks, ladies! and kelly - LOL.
ReplyDeletethe keep calm stamp is from terbearco's etsy shop (http://www.etsy.com/listing/62730628/keep-calm-and-carry-a-wand-witch-mounted?ga_search_query=keep%2Bcalm&ga_search_type=user_shop_ttt_id_5170423)
and i made the initial with leaf circle using martha stewart's custom stamp kit (http://www.eksuccessbrands.com/marthastewartcrafts/Products/Custom_Stamp_Setting_Kit_40-24008.htm)
awesome tutorial! I want to try this!
ReplyDeleteglad you liked, good luck!
ReplyDeletethis is such a neat idea! great tutorial :)
ReplyDelete